Motivation
Spurred by the combination of controlling a hexapod via Haskell code, I planned to build the first ESP8266-based hexapod running solely on Purescript. You might ask why? Good question! A comment on Reddit regarding alternative ways to develop ESP8266-based projects set the “final trigger” :)
[…] But if you want to be really unique, use Evil mode on Emacs and cross compile PureScript code to Javascript and run that JavaScript on the ESP8266. You will very likely be the only person on the whole planet using that combination.
*cough* After 2 days trying to glue NodeJS respectively Espruino1 APIs via Purescripts Foreign Function Interface, I finally pivot to old-school C++ to finish the job, and loosing thereby all of the $wag.
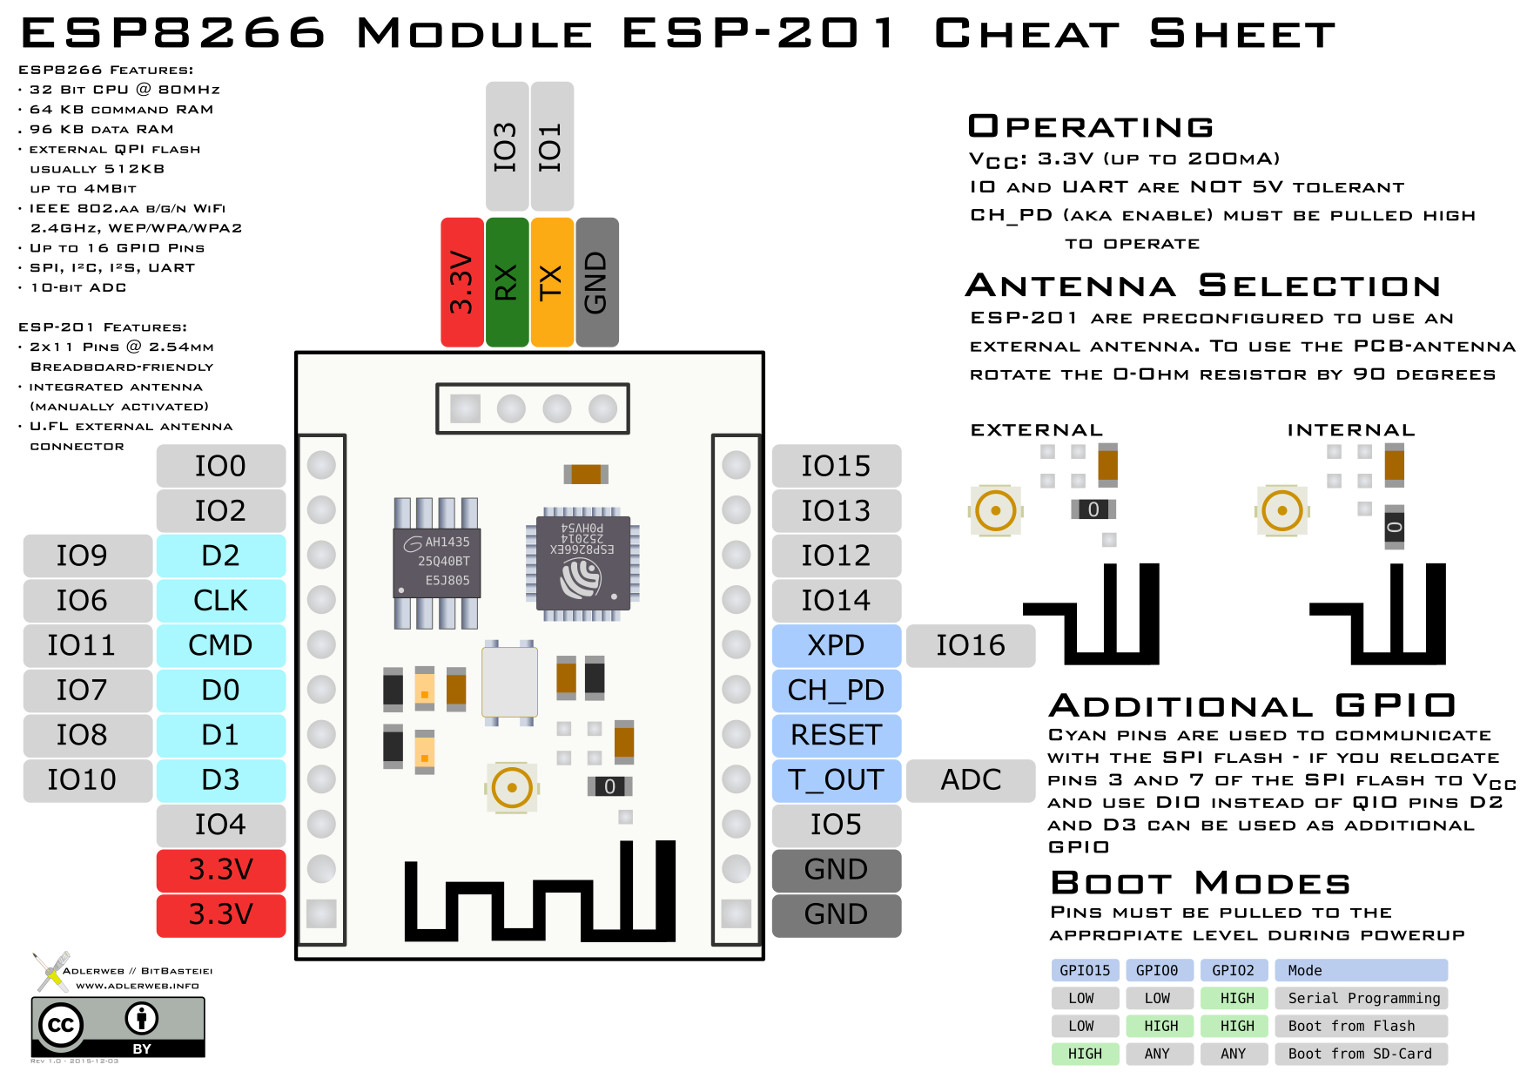
At this point you might be asking what the heck is a ESP8266? I’m glad that you asked. Originally it was/is used as a WiFi shield for Arduino computers. But the truth of the matter is that the ESP is already powerful enough for building diverse DIY applications. Just look at the vast amount of projects based on it: https://hackaday.com/tag/esp8266/.
Demo Time!
Before explaining all of the nitty gritty details, first have a look at the final “result”
ELI5: How did you build it?
You’ll need:
- 1 x ESP8266 201 chip
- 3 x Micro Servos (3,7g)
- 2 x Lipo batteries (240 mAh at 3,7 V)
- 1 x 330 Ohm resistor
- 1 x 1k Ohm resistor
- 1 x 100 nF capacitor
- 1 x soldering iron
- 1 x hot glue gun
- some wires
The approx. total cost will be around 10 - 20€ depending on your existing equipment.
Circuit Diagram & Breadboard Configuration
The spideruino Github repository also contains Fritzing diagrams displaying the actual circuit diagram and breadboard configuration. If you want to use them, install the following module beforehand: Fritzing ESP8266-201 module. The original ESP pin out can be found here. If you have trouble to follow along, then have a look at the building instructions at a similar project: pololu.
Notice: To upload your code from the Arduino IDE to the ESP, you have to ground the pin 0 in order to boot in serial programming mode. Here you can learn how to import the ESP board into the Arduino IDE.
spideruino – Quo Vadis?
Before examining the code, let’s figure out how spideruino moves at all.
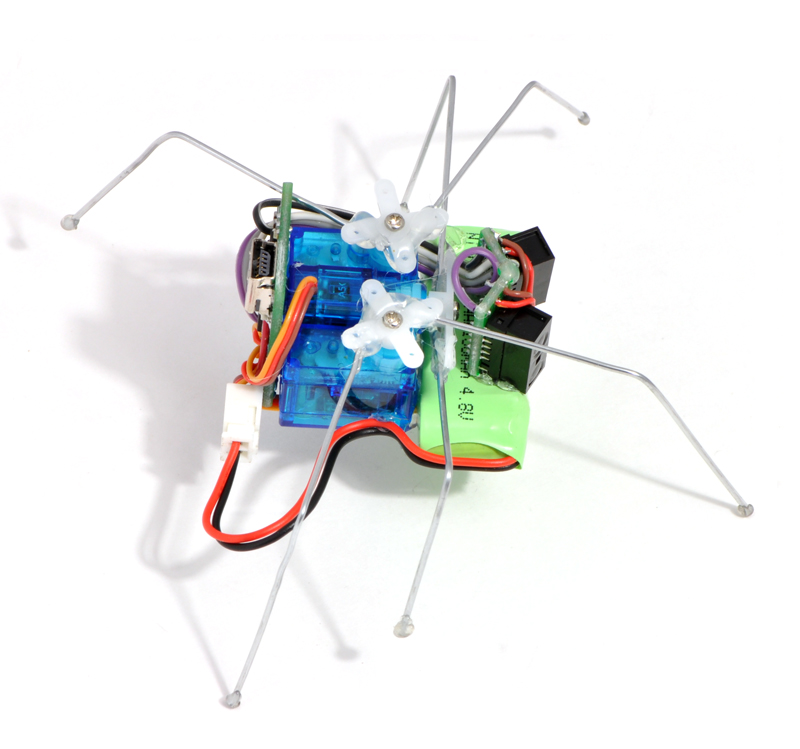
Right legs are front, left legs are back and middle leg (left) is touching the ground.

Right legs are back, left legs are front and middle leg (left) is touching the ground.
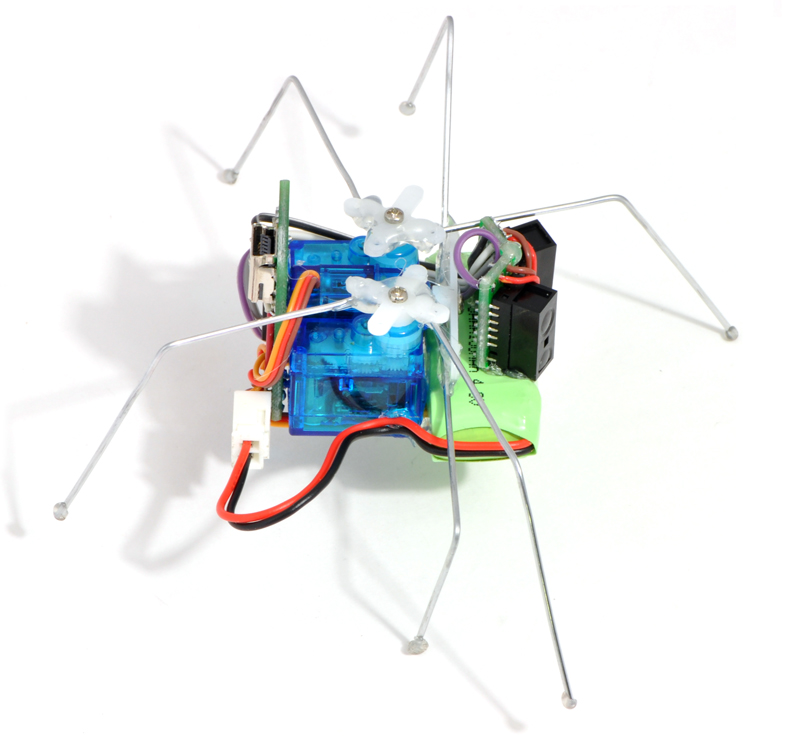
Right legs are back, left legs are front and middle leg (right) is touching the ground
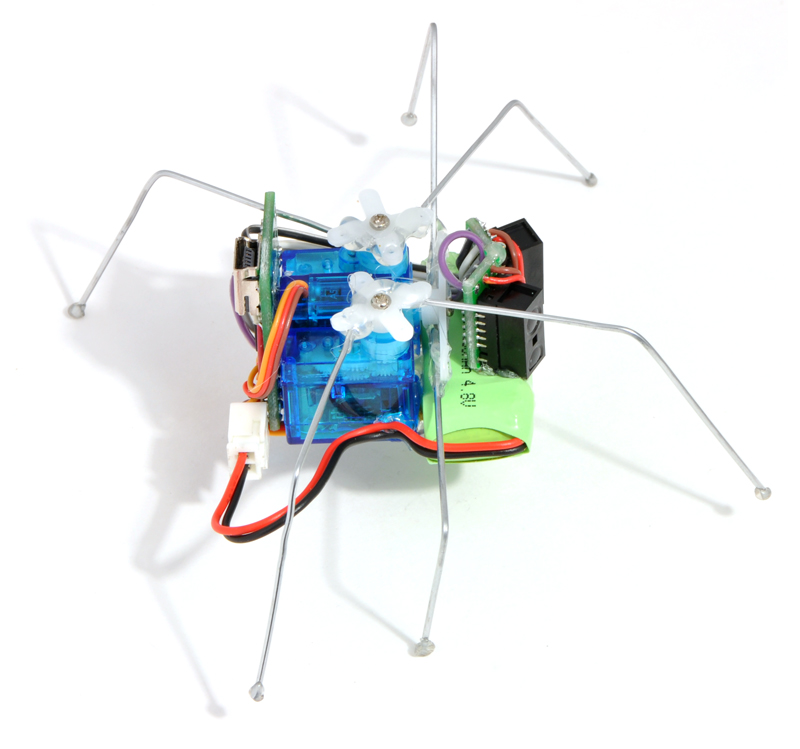
Right legs are front, left legs are back and middle leg (right) is touching the ground.
In a nutshell: The frames are displaying the ‘forward’ movement pattern of the spideruino gait. As you probably figured out, the main idea is to move diagonally while shifting/alternating the weight around the center line.
This lead to the following design:

The idea here is to map the shown pattern to ultimately servo positions. The servo positions again are divided into frames, which will be played sequentially depending on the moving direction.
Show me the code
Note: For better readability I trimmed the listing to the relevant parts.
As you can see, setup() is creating an WiFi access point and binding a HTTP web server on port 80. You might be guessing what loop() is doing… it’s basically a callback function to handle incoming HTTP client requests. The rest of the code should be trivial to understand: when for example /forward is called then the well tuned frames (i.e. arrays of servo positions) will be simply looped over in order to perform the corresponding movement.
Finally…
With just some lines of code you can also build a remote-controlled hexapod too! If so, I hope that this post will be helpful to you.
As always: the final codebase can be found on Github.
-
Espruino allows to use JavaScript directly on a ESP chip. ↩